Start from zero — get ClawHeart running
A beginner-friendly walkthrough. 5 chapters, 13 screenshots — scroll top to bottom and you'll have the full Agent-onboarding → monitoring-alert loop wired up.
Getting StartedFirst launch — meet the home dashboard
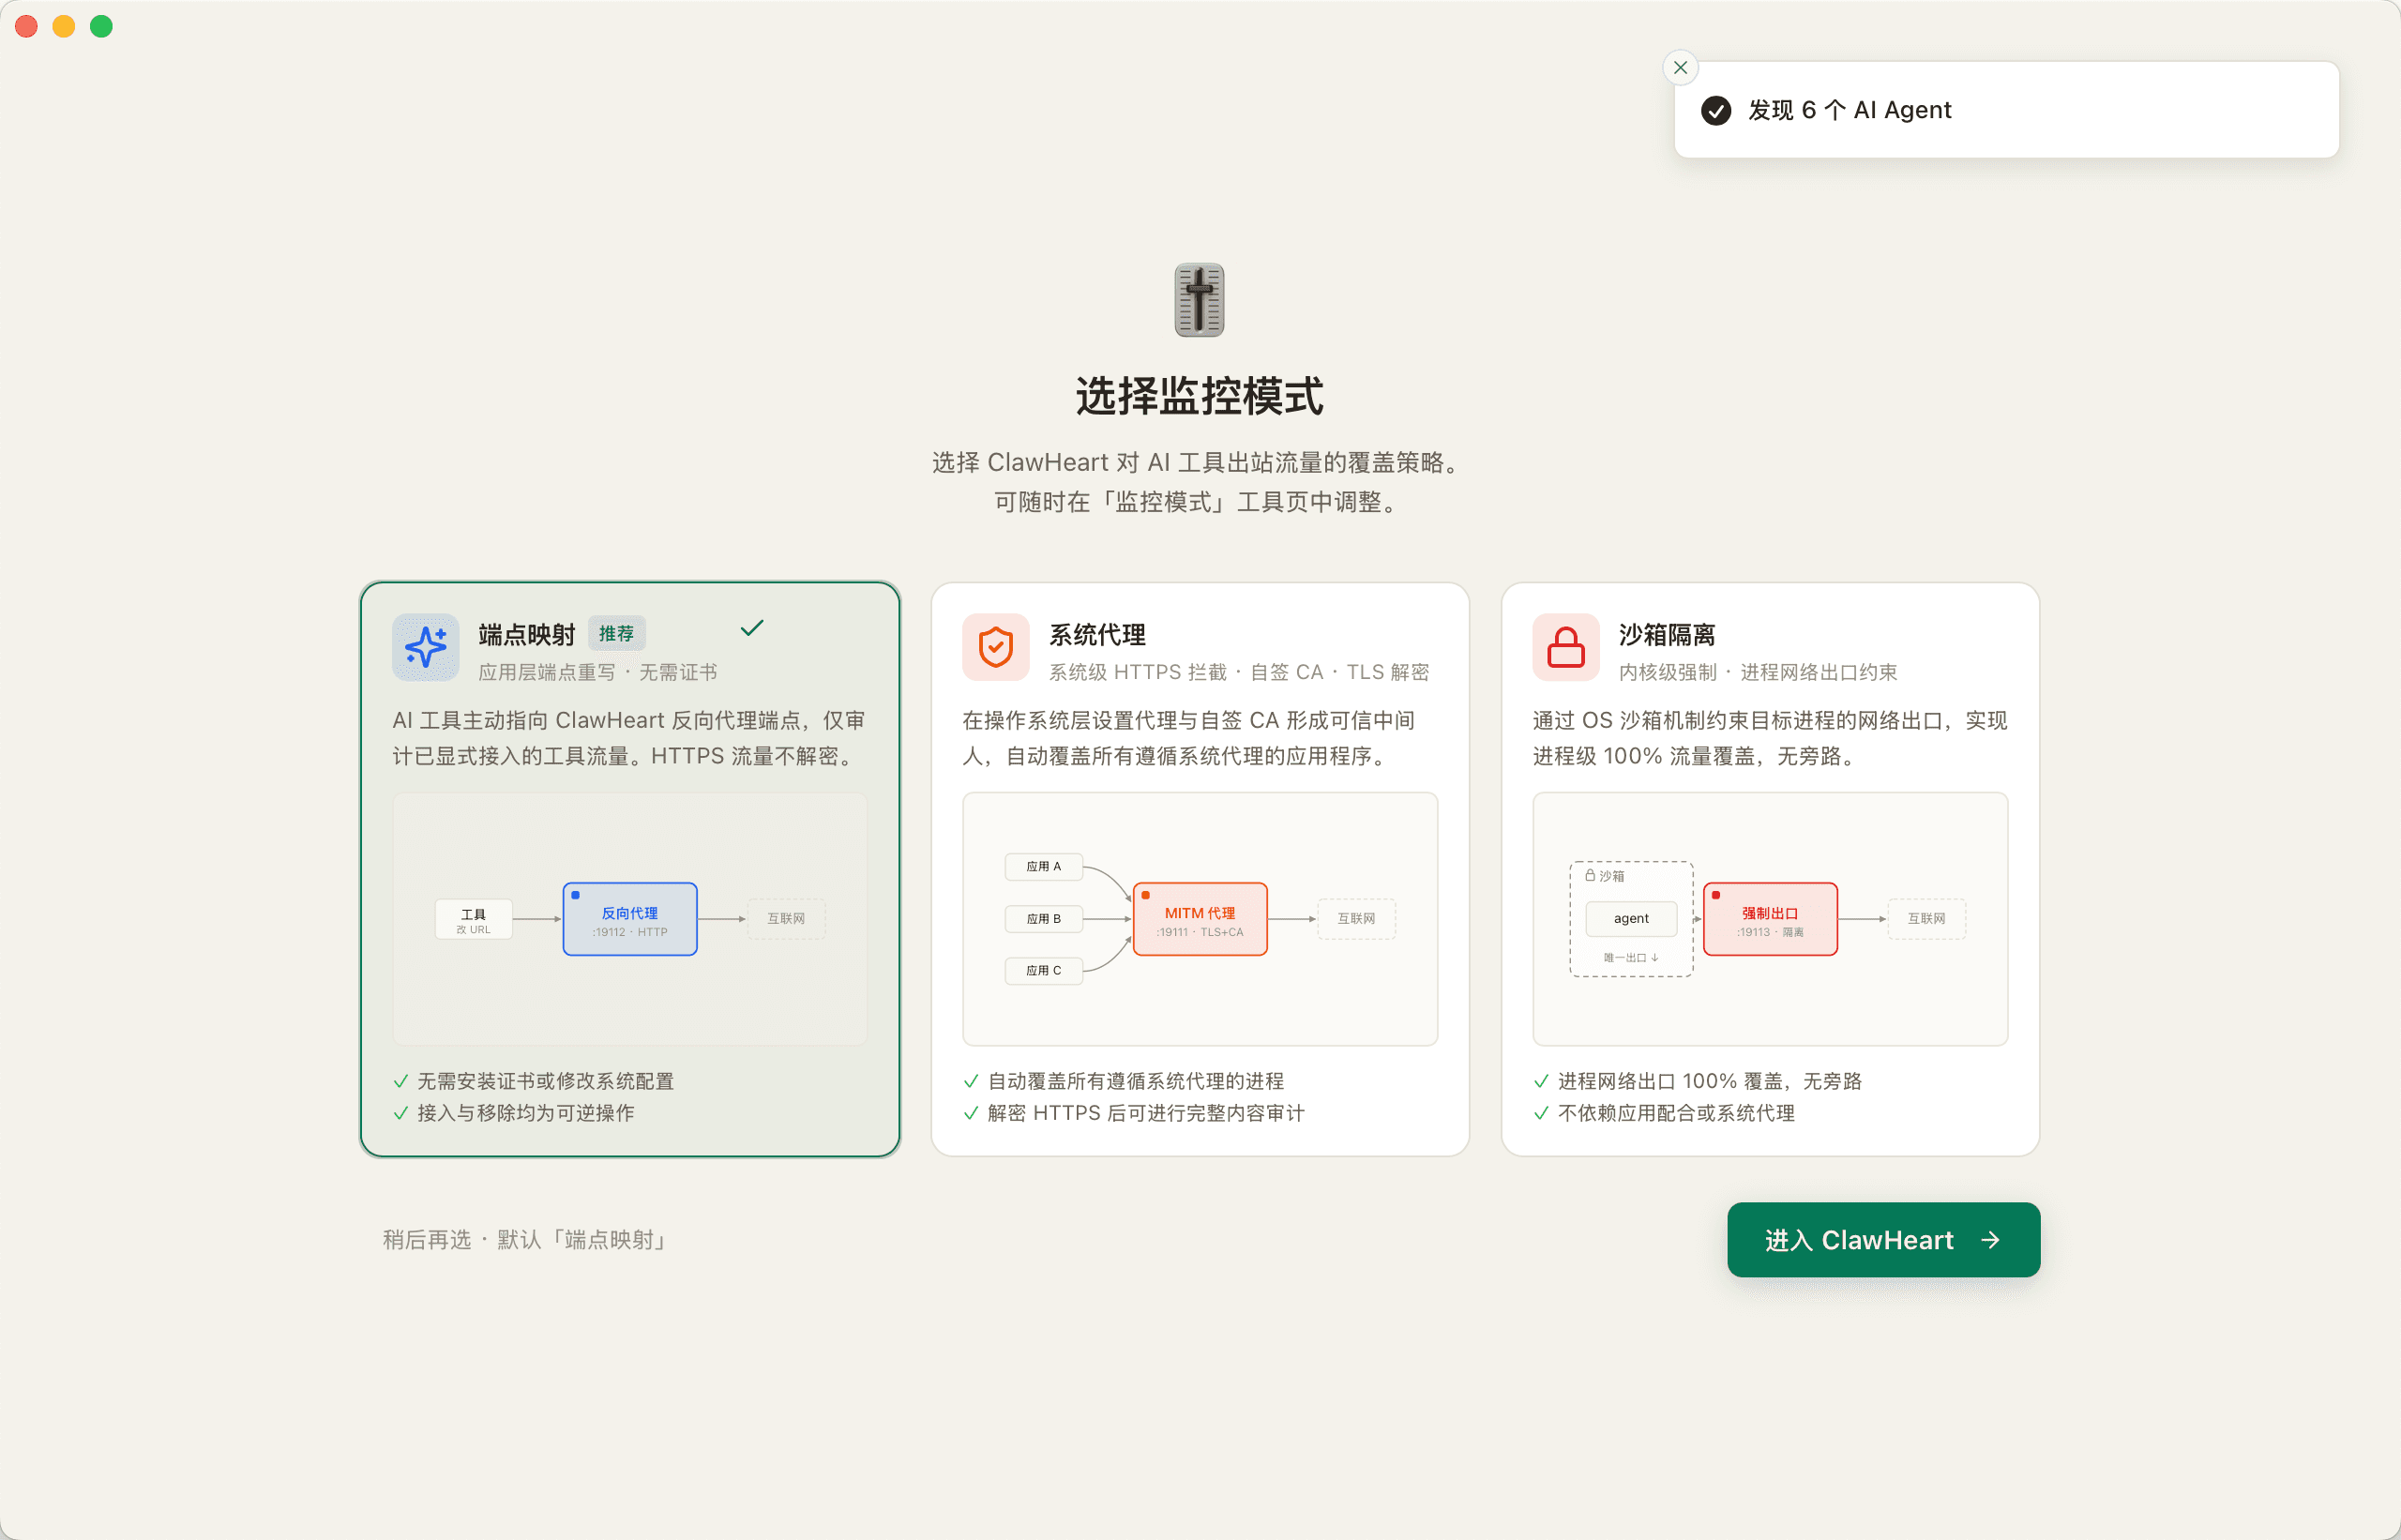
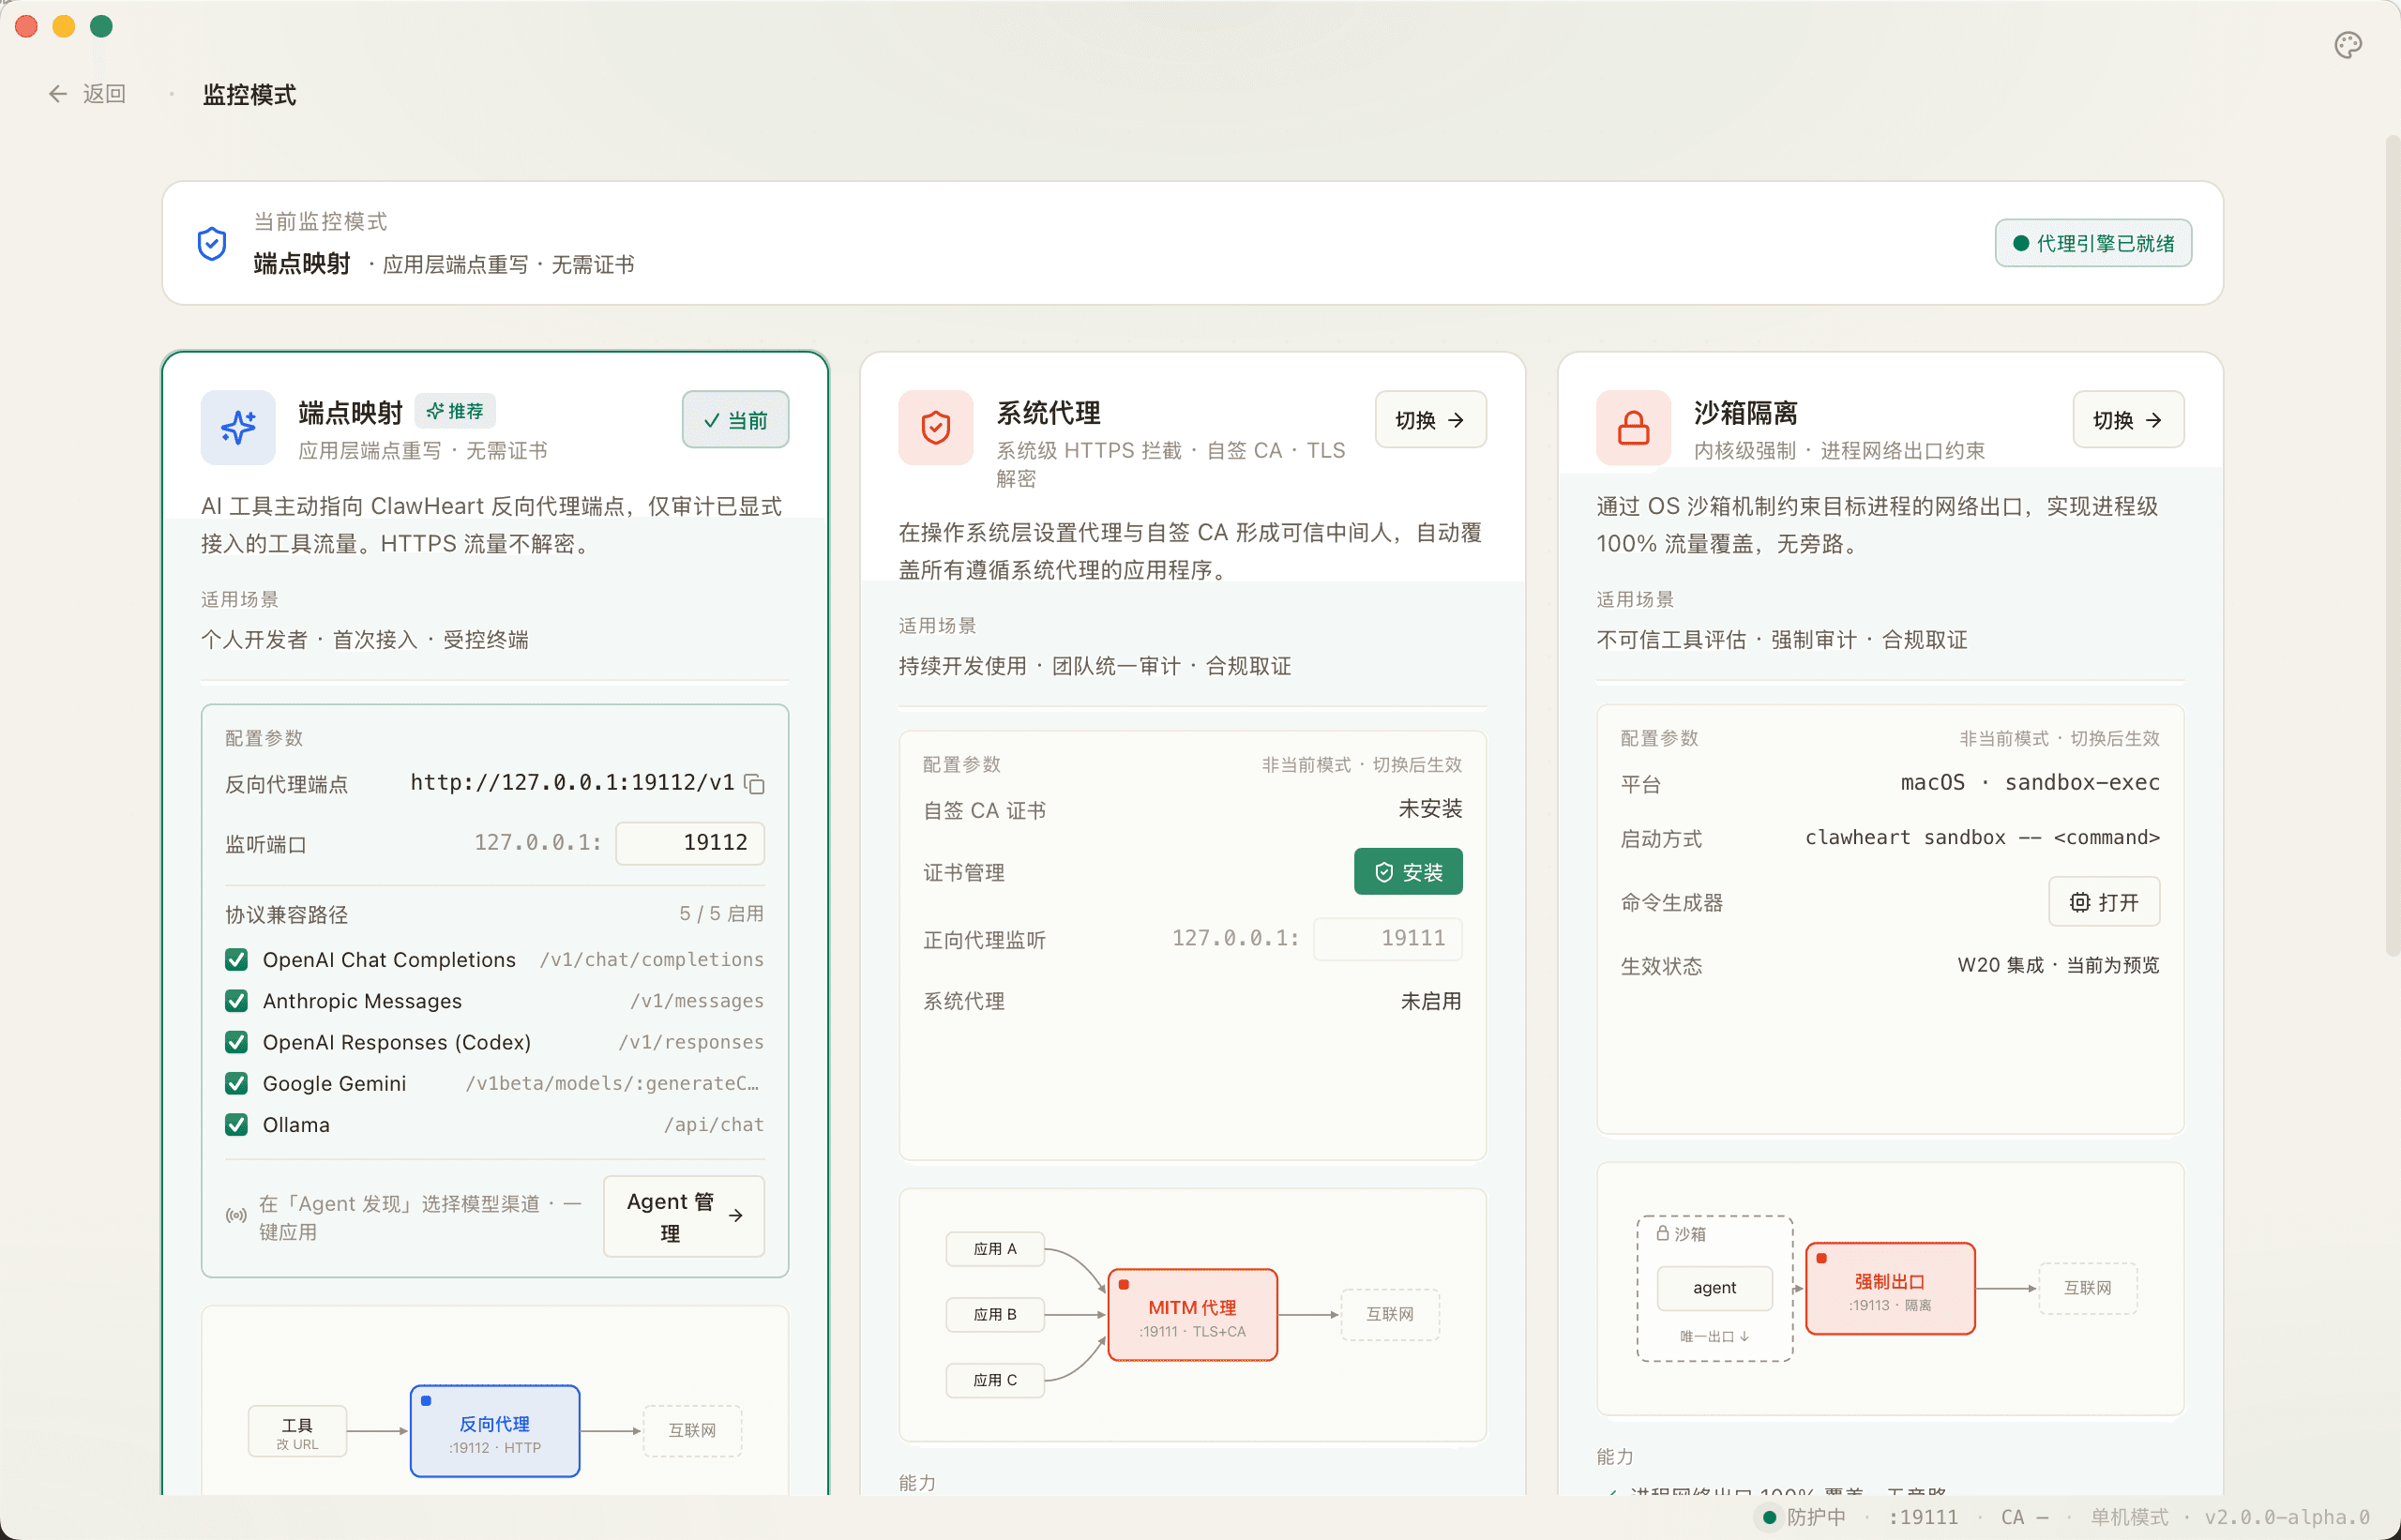
Pick a monitoring tier
First launch shows an onboarding screen where you pick the monitoring intensity.
"Endpoint Mapping" is the zero-touch app-layer option; almost everyone starts there. The other two (System Proxy / Sandbox Isolation) are advanced options you can switch to later from the "Monitoring Mode" page.
- tier1 Endpoint Mapping = point the Agent's BASE_URL to ClawHeart
- tier2 System Proxy = MITM covers every process honoring the system proxy
- tier3 Sandbox Isolation = kernel-enforced, impossible to escape
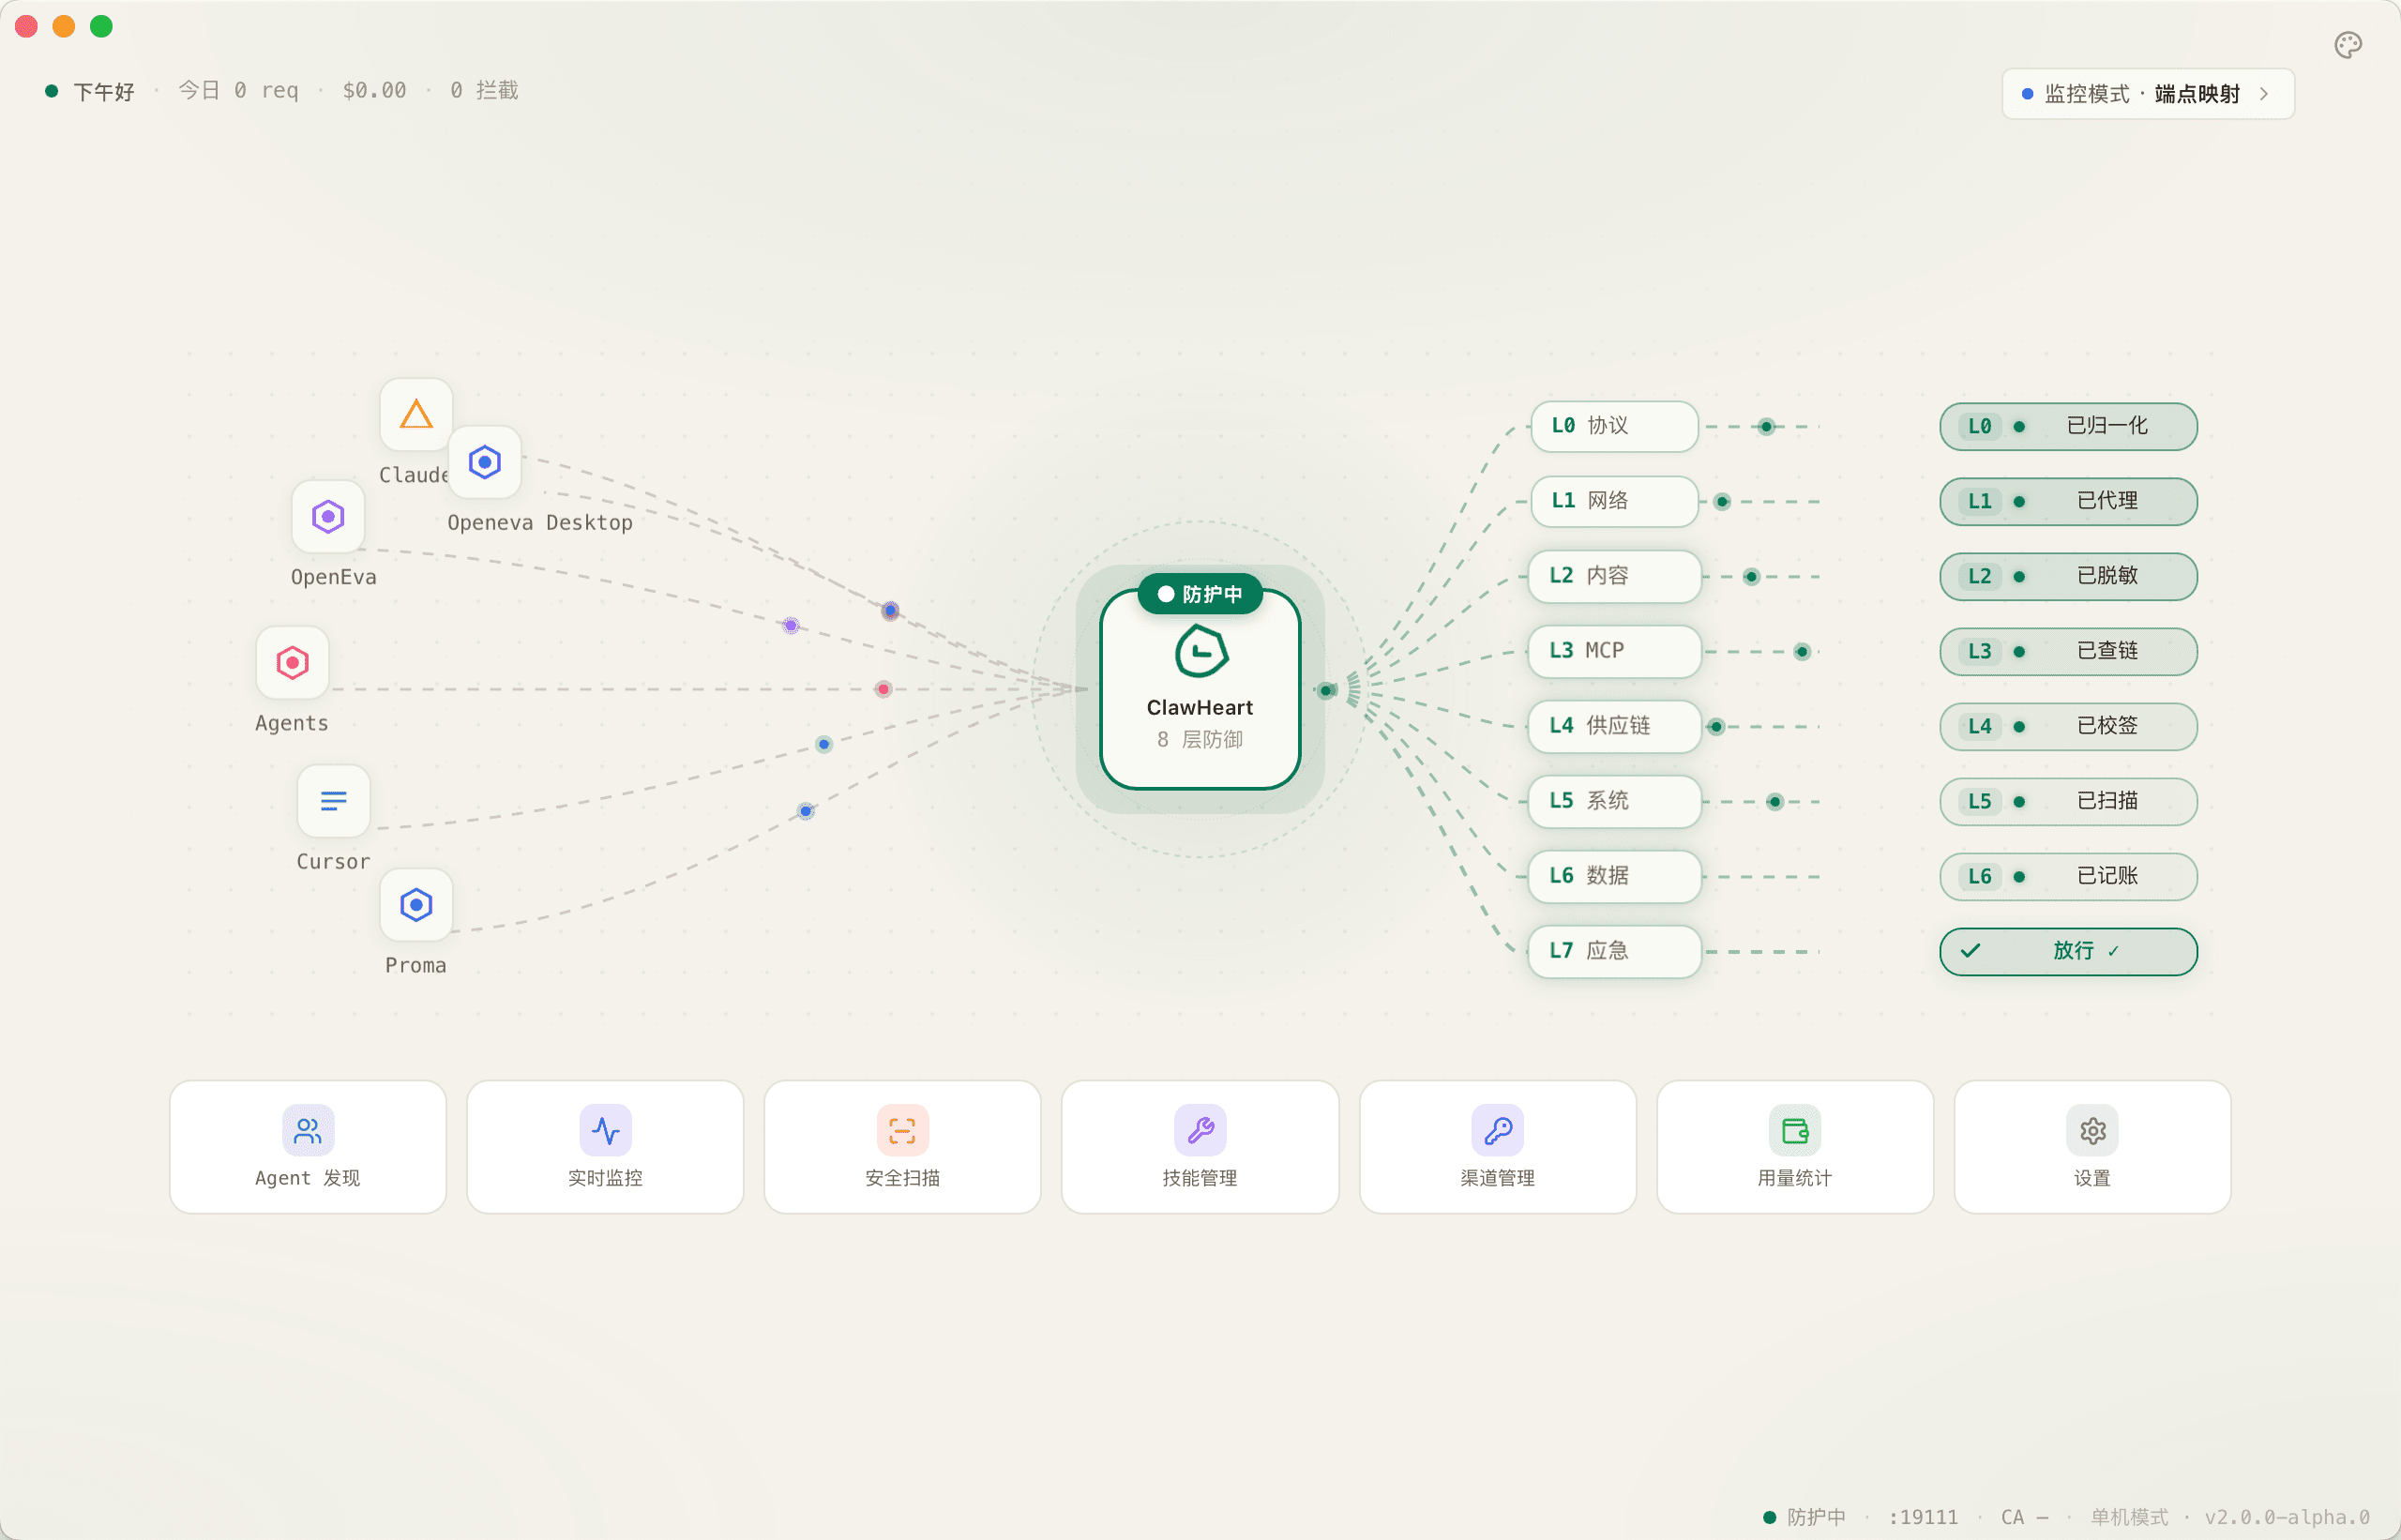
Home overview
The home page has a Hero animation up top (showing the 8-layer defense intercepting in real time) and a row of 7 tool cards below — Agent Discovery, Monitoring, Scanning, Skills, Usage, Settings, and more.
Treat the home page as your dashboard: jump straight into any tool, with breadcrumbs to step back from anywhere.
ConfigurePlug Agents and channels in
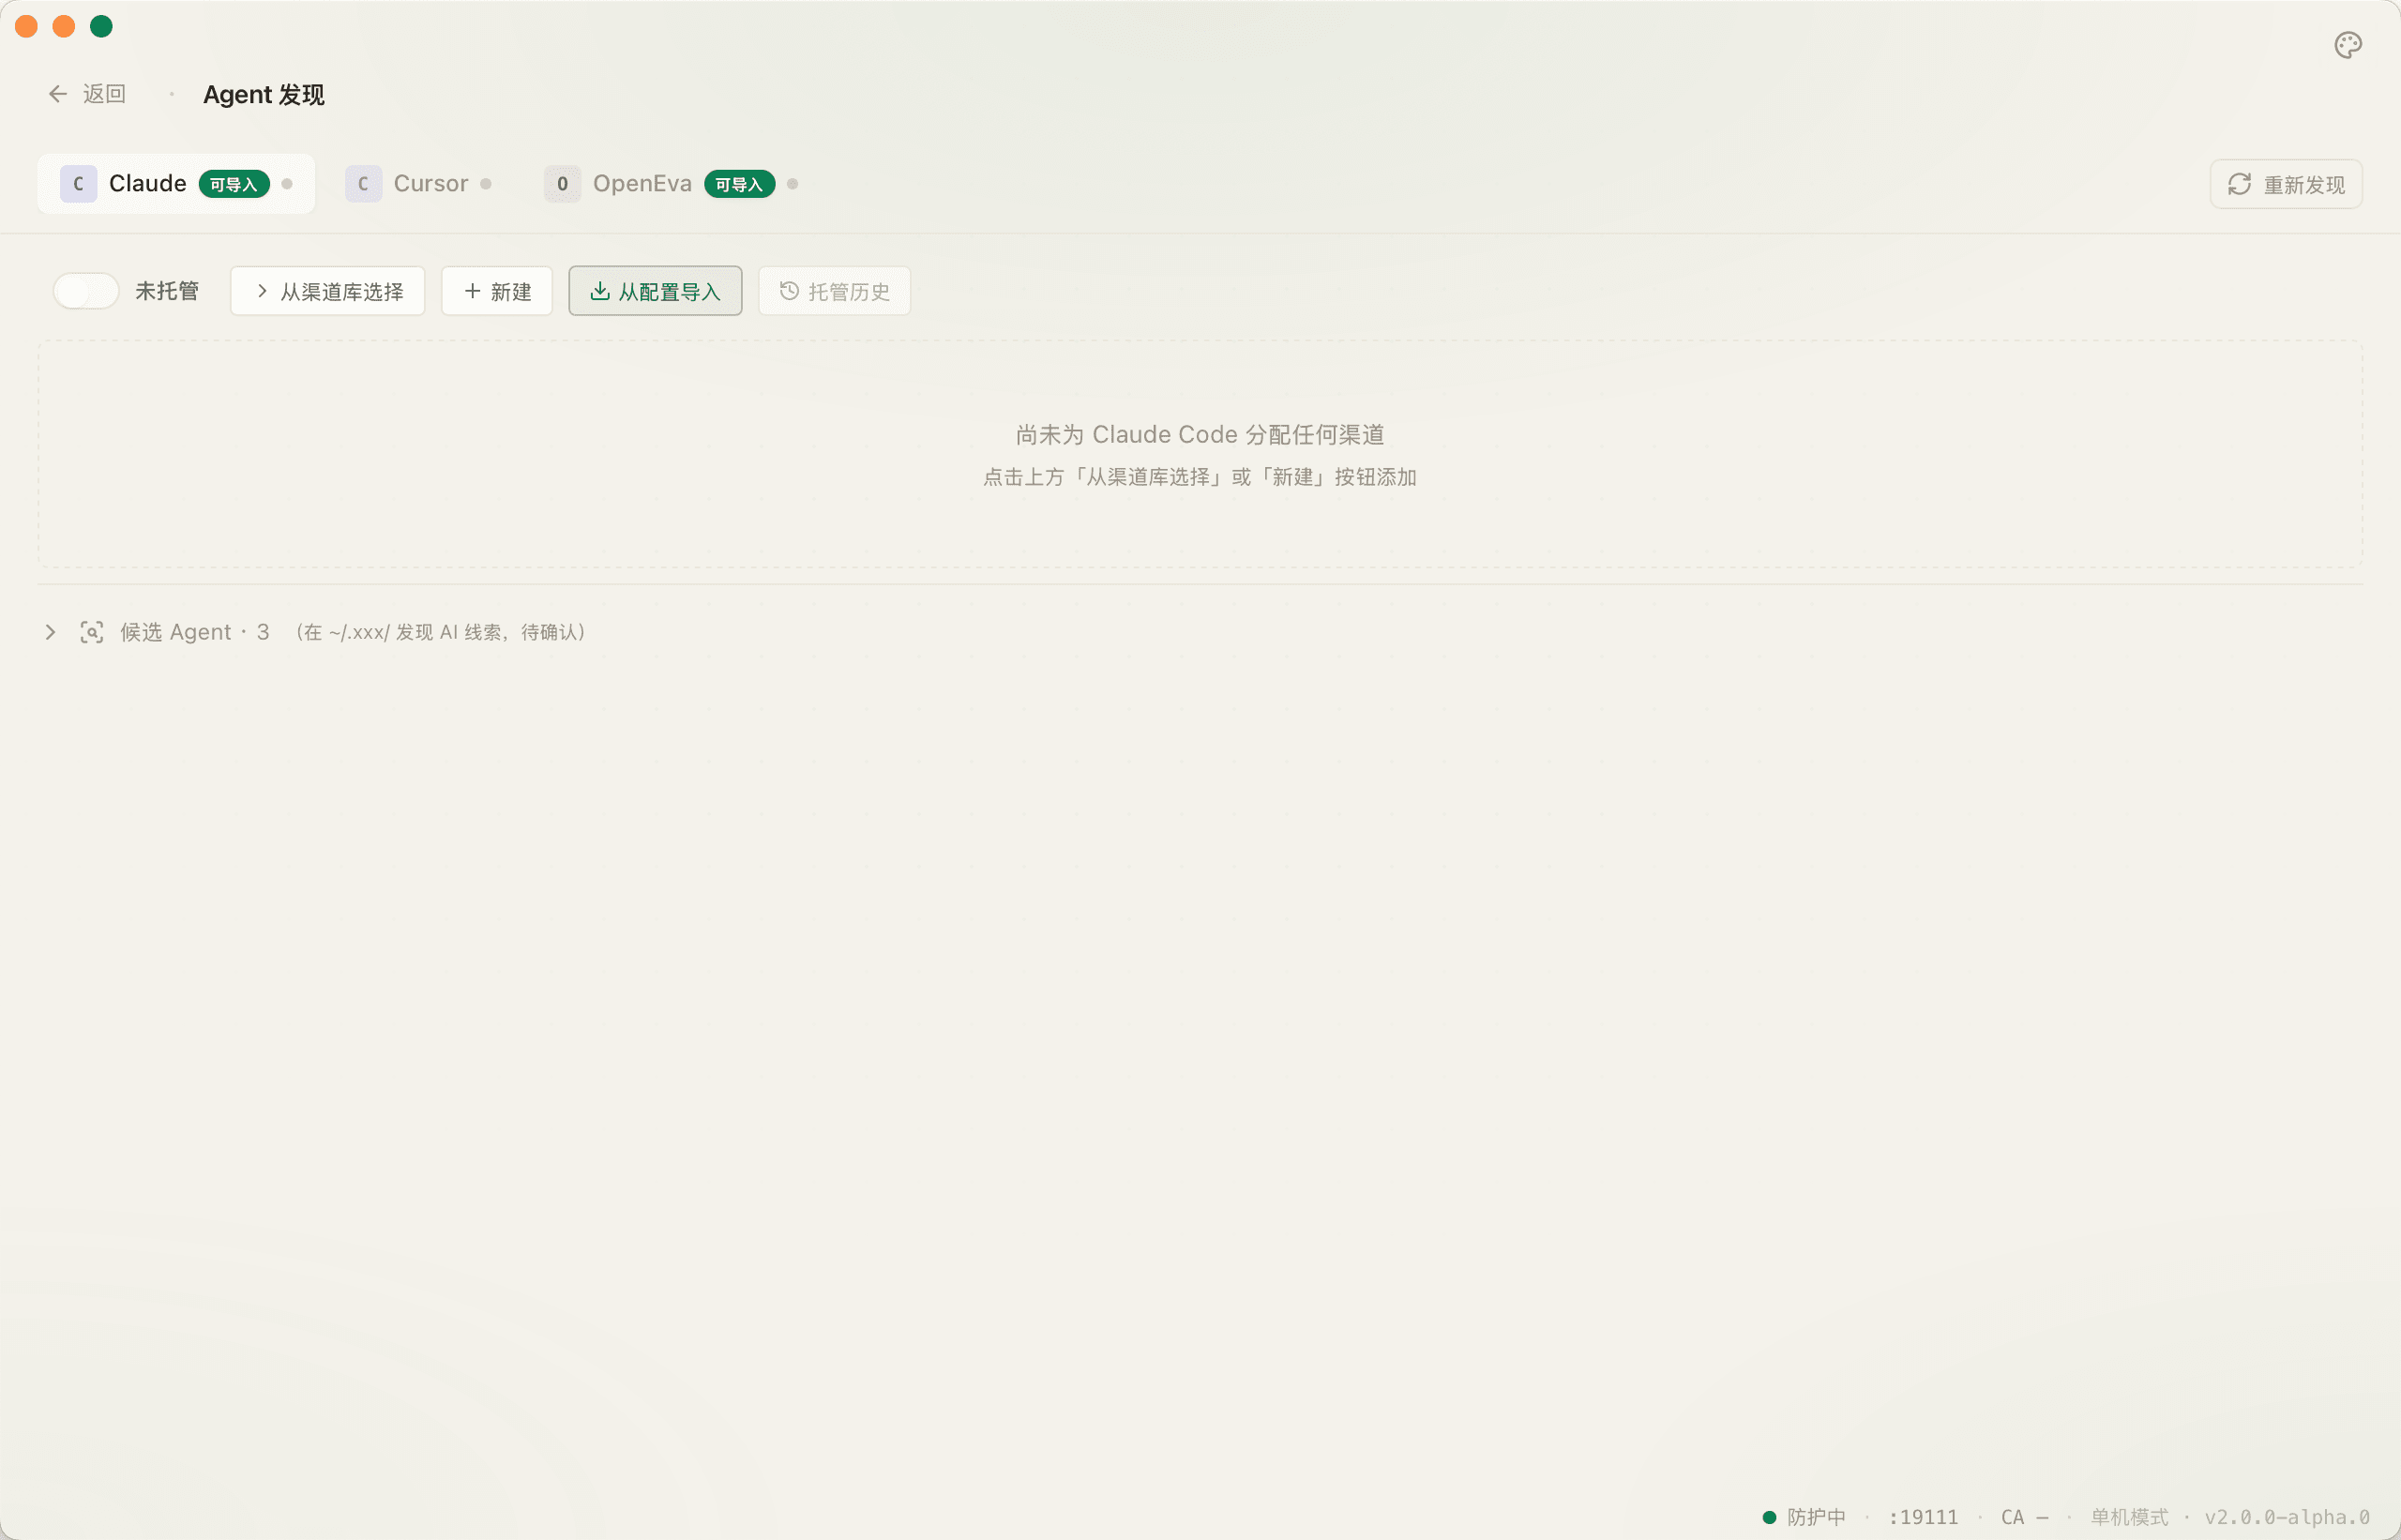
Agent Discovery page
Open the first card "Agent Discovery" from the home page. The top tab switches between agents (Claude Code / Codex / Cursor / OpenClaw / Hermes …); the bottom shows the channels currently assigned to the active agent.
The "Importable" badge in the top-right means ClawHeart can parse that agent's local config and import its channels in one click.
Reverse-import existing config
"Import from config" opens a candidate list showing each provider / base_url / key status detected in the active agent's config file.
If the agent uses login-based auth (no native API key), a yellow warning at the top of the dialog tells you "no local key available" — just hit OK and skip.
- OpenClaw / Codex / Gemini support reverse-import
- Selected items are bulk-added to "Model Channels" and auto-assigned to the current agent

Add a channel manually
If reverse-import can't find what you want, or you want to add a third-party relay, hit "New" to open the add-channel dialog. The top half is a grid of 65 common upstream presets (one click auto-fills base_url / protocol); the bottom half is a free-form form.
API keys go straight into the OS Keychain on submit; the database only ever sees a masked value.

UseOne-click takeover, rollback any time
Enable takeover
Pick a channel and flip the "Takeover" switch in the toolbar. ClawHeart rewrites the agent's config (base_url becomes 127.0.0.1:19112) and every request now flows through the ClawHeart gateway.
Green switch + lit status dot = it's live. Restart the agent and you're done.
- The original config is backed up before any change
- Credentials are swapped for a virtual `sk-claw-xxx` key; the real key never leaves the Keychain

Takeover history & rollback
Click "Takeover History" in the toolbar to open a right-side drawer listing every takeover change for that agent — time / before / after / rollback button.
Any change can be reverted to that point-in-time config state. The operation is atomic — no half-applied state.
Core FeaturesMonitor / Scan / Usage / Skills
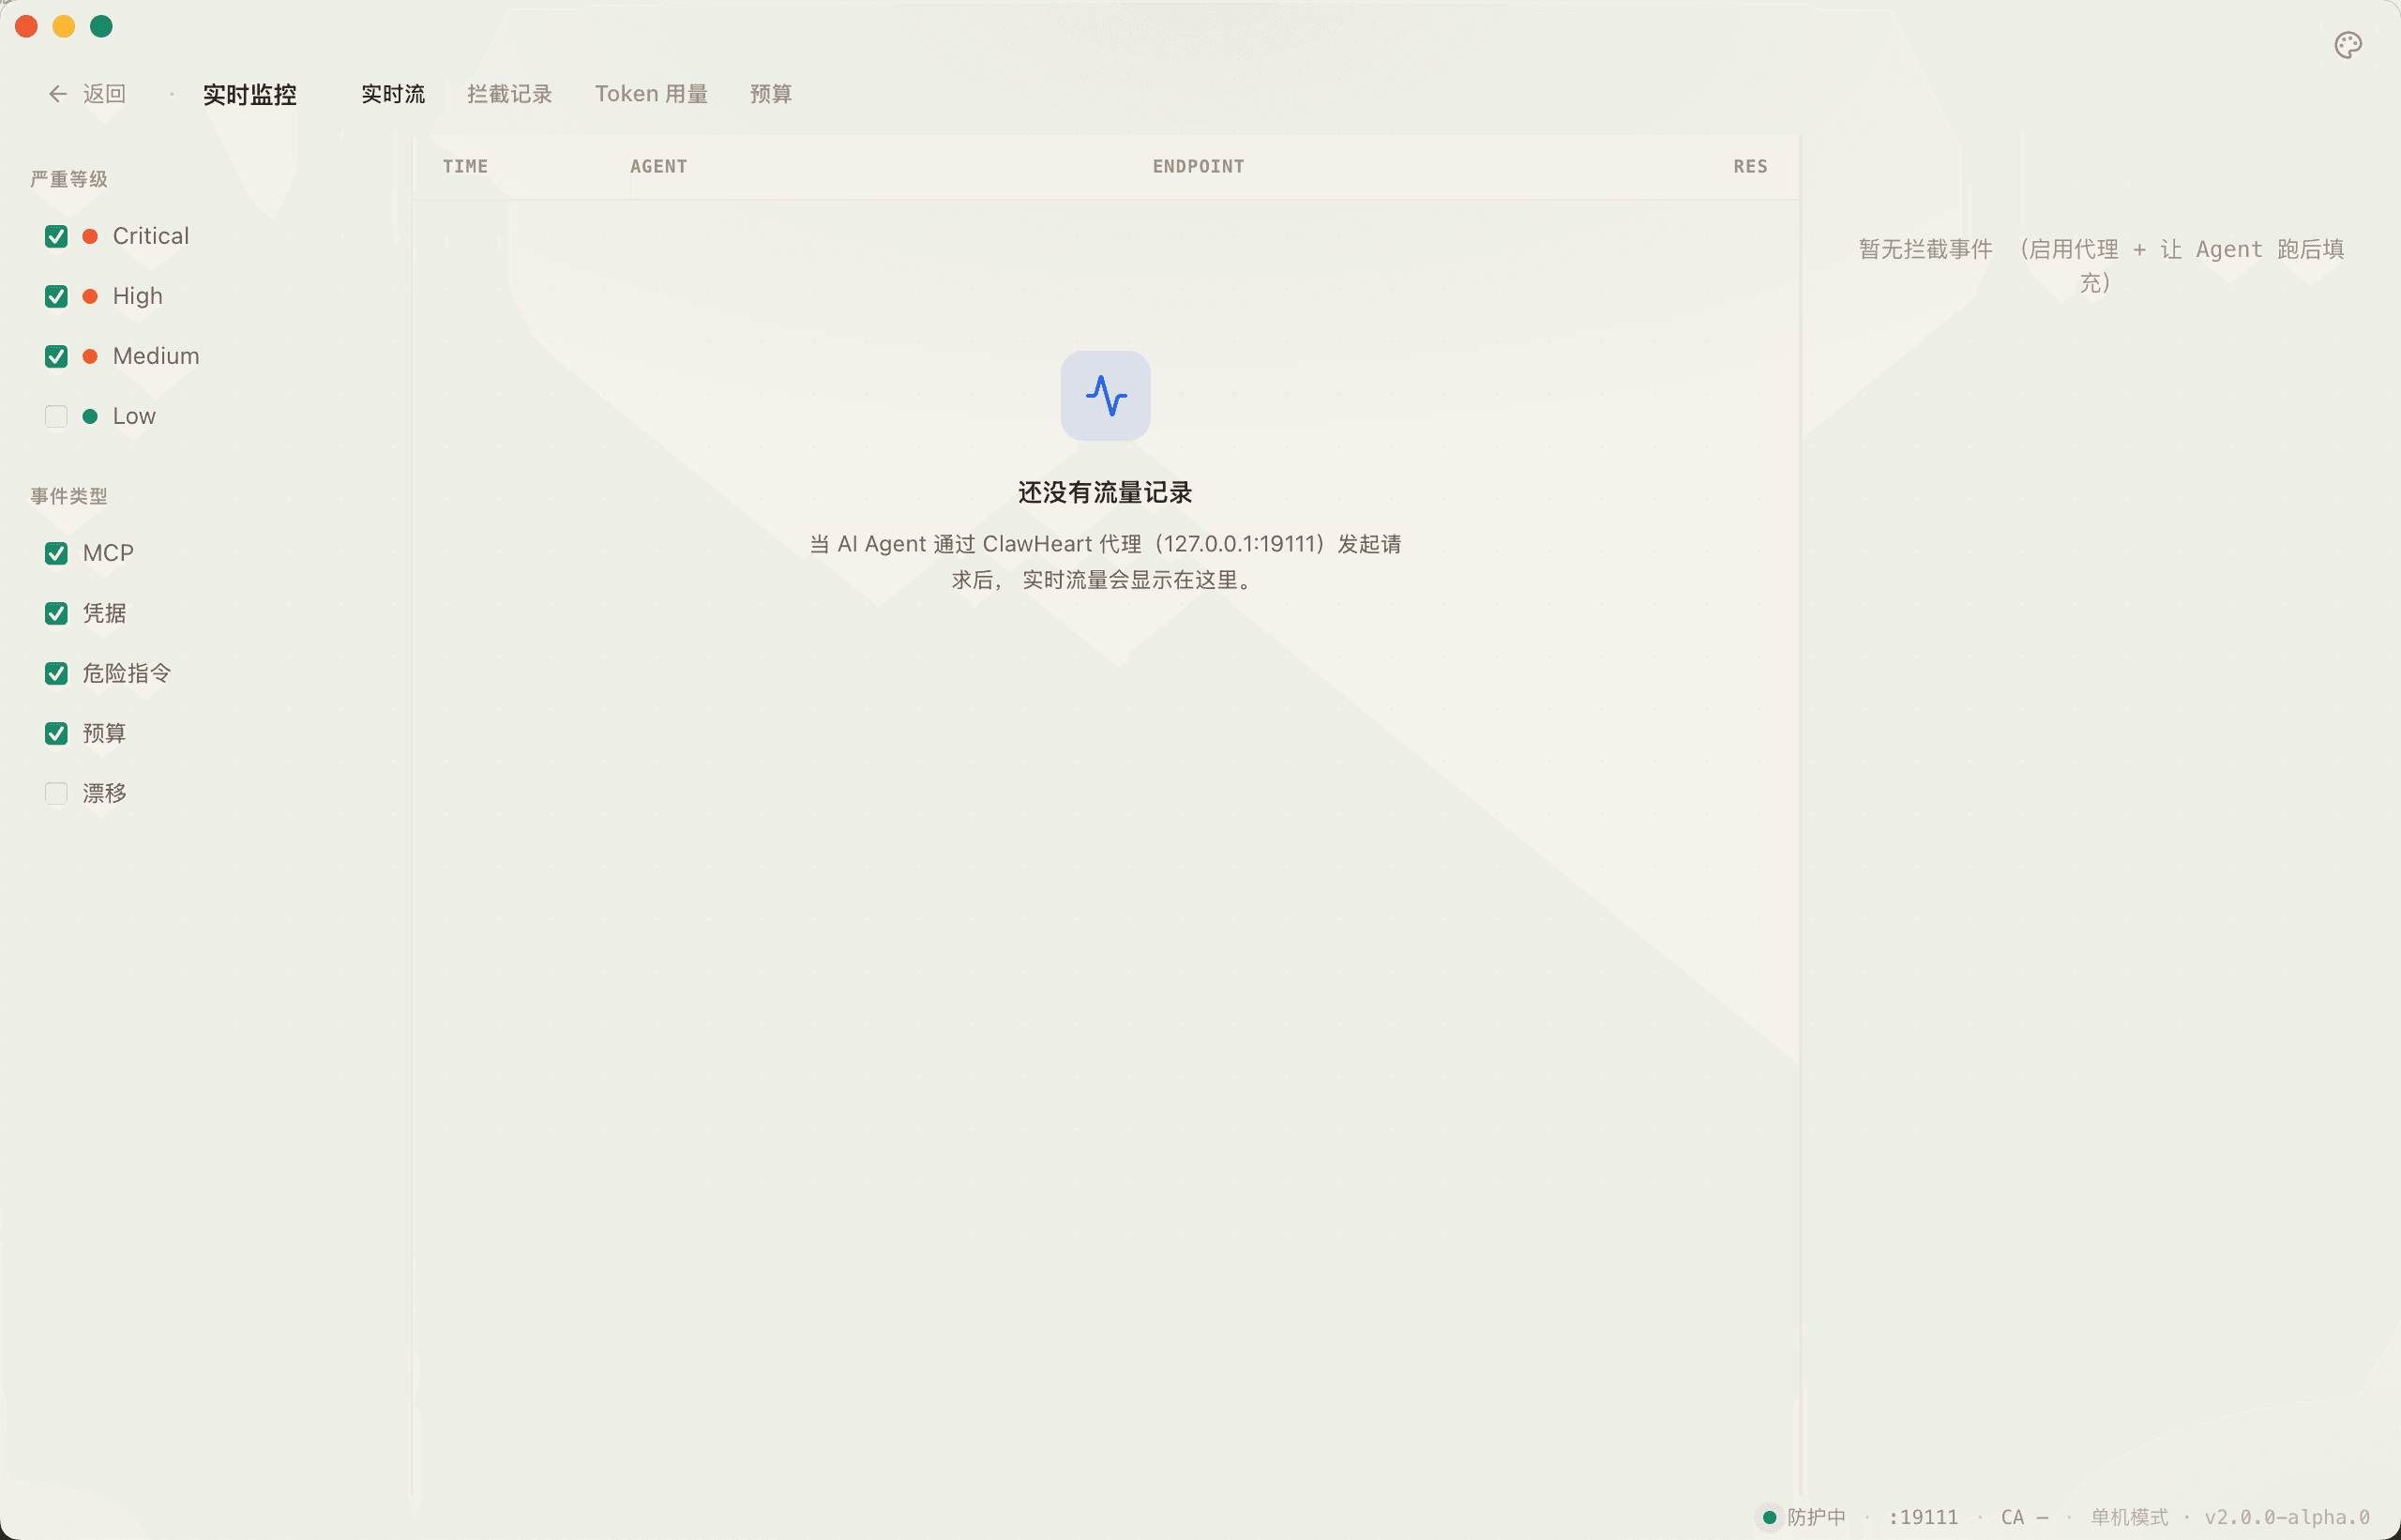
Real-time monitoring
The monitoring page has the request stream on the left (a timeline) and intercept events / token usage on the right. Click any row to expand the payload, normalized form, and any rules that fired.
Everything lands in local SQLite — close the app, reopen later, all of it is still there.
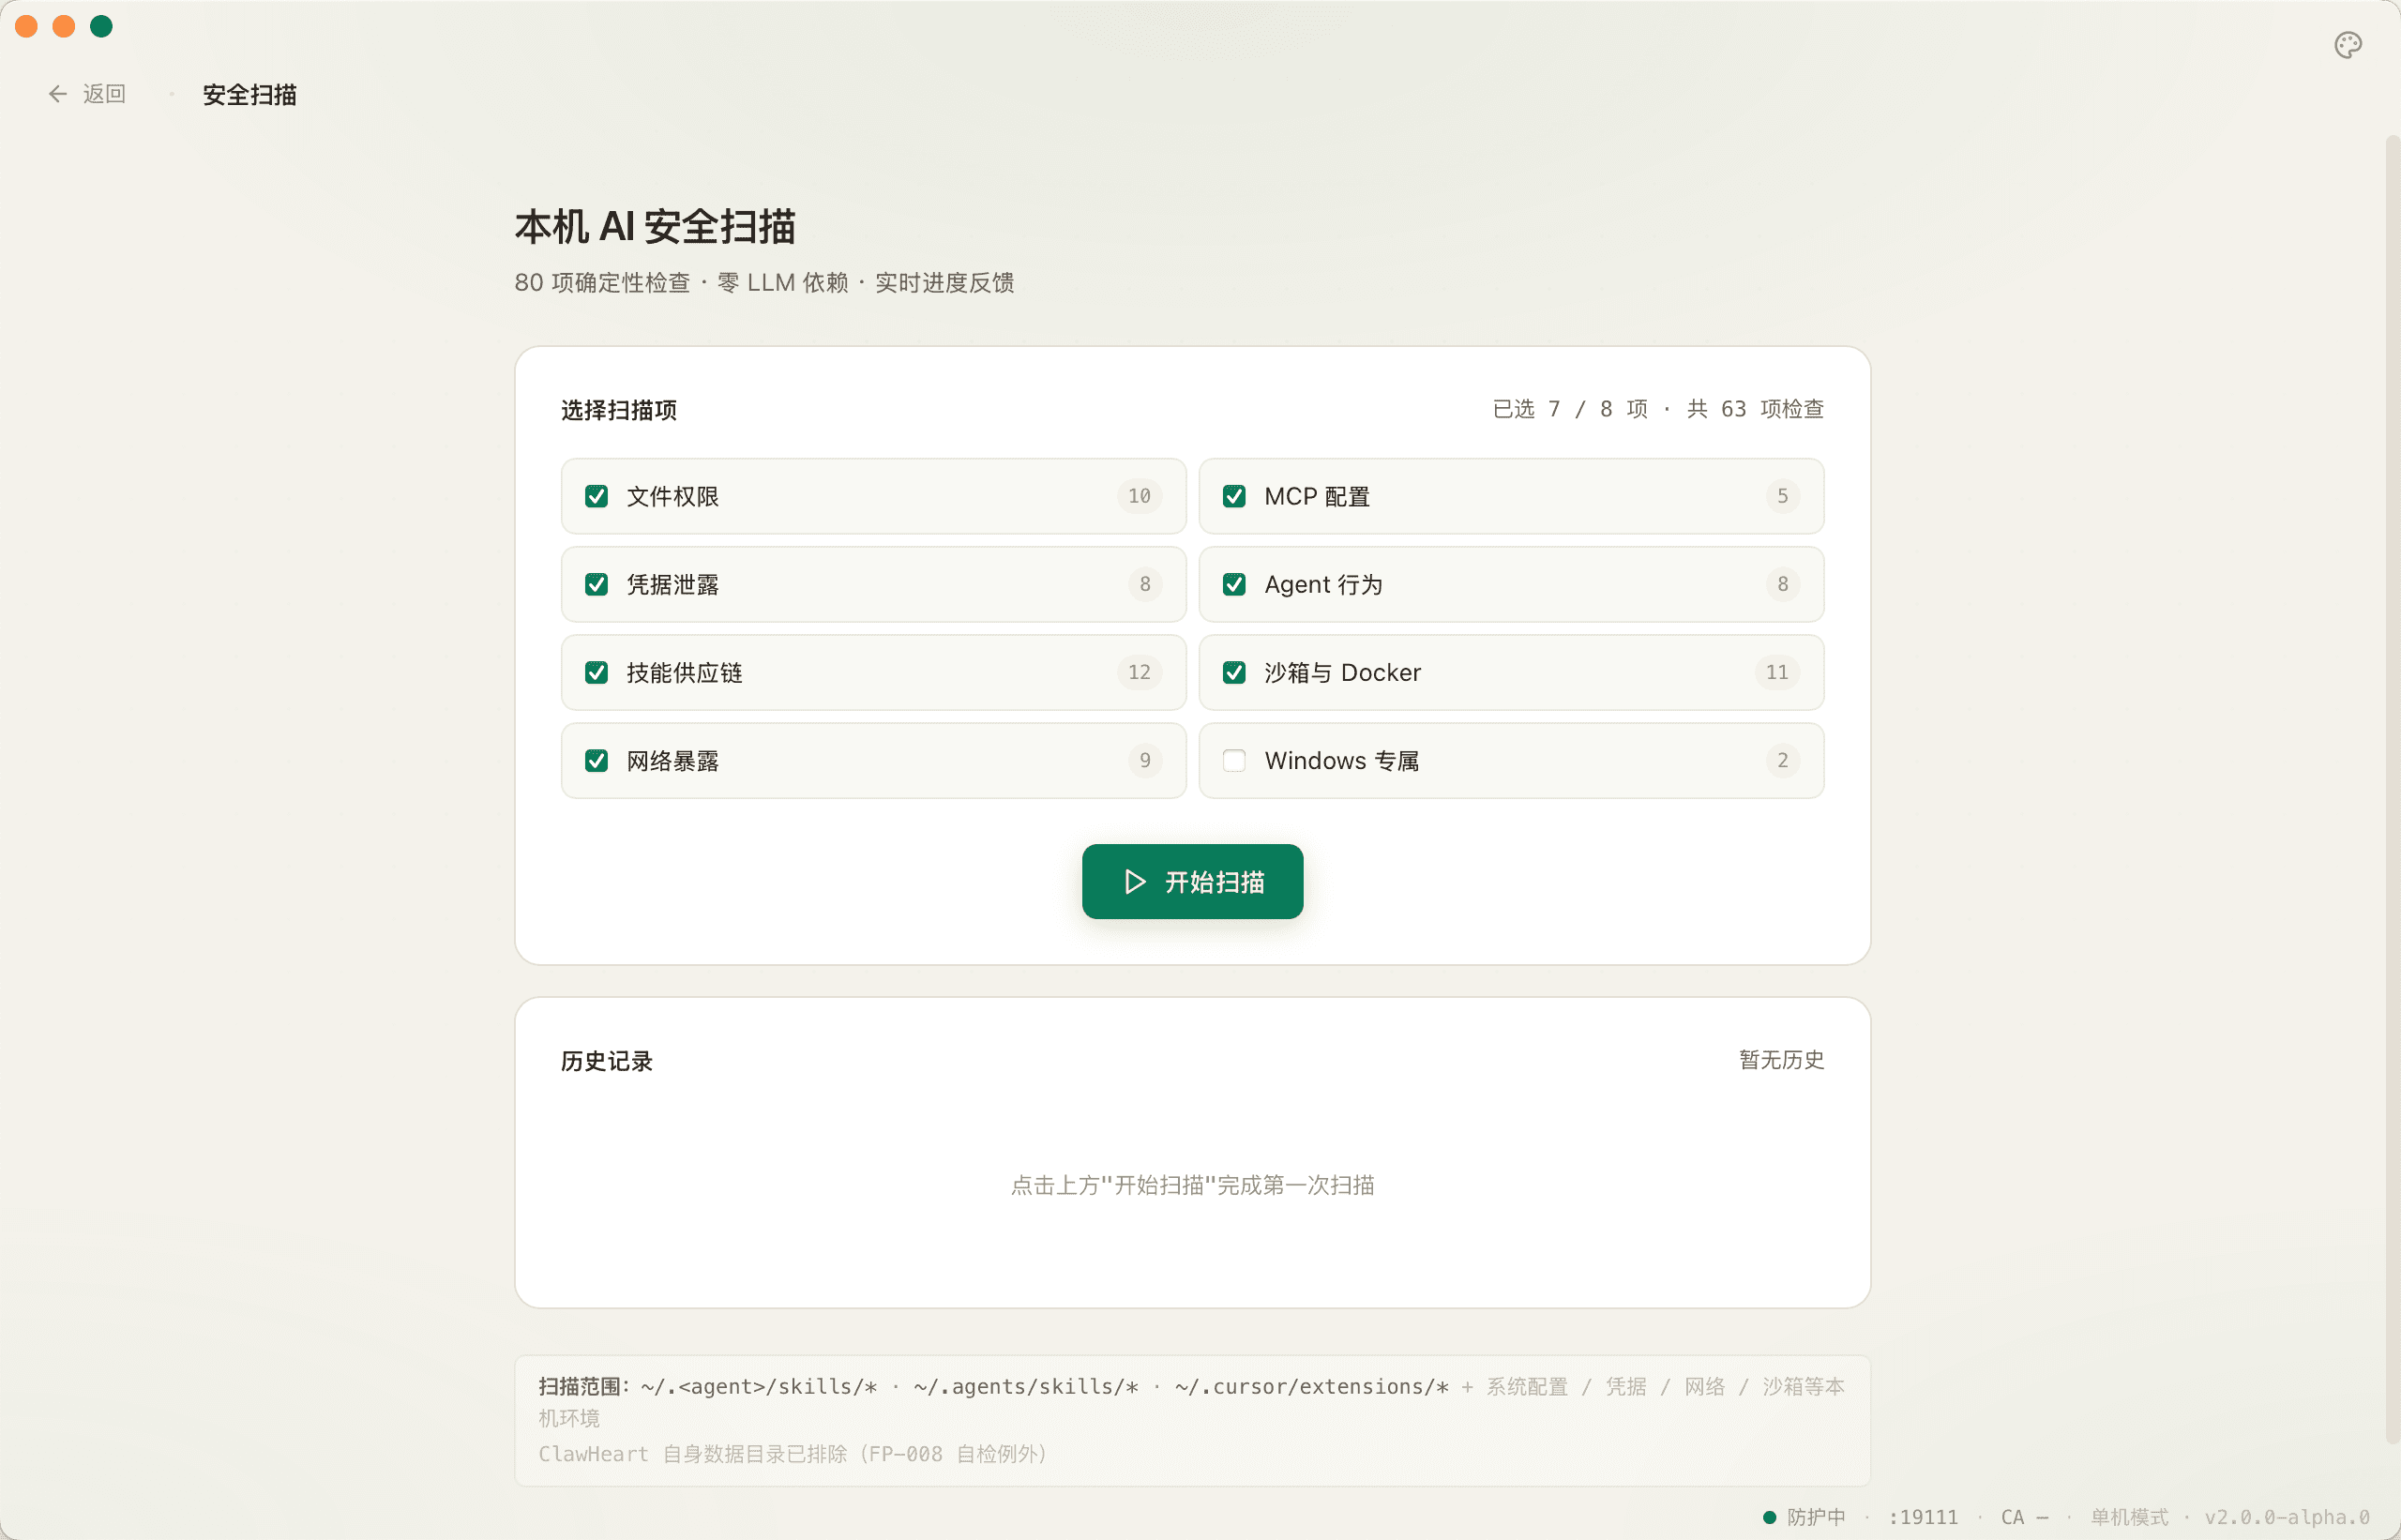
80 security audits
The scan page runs 80+ checks across 8 categories: file permissions · credential leaks · MCP config · agent behavior · skill supply chain · process allowlist · network egress · Registry / Keychain.
Results are grouped by severity; click any item to see the evidence trail and suggested fix.
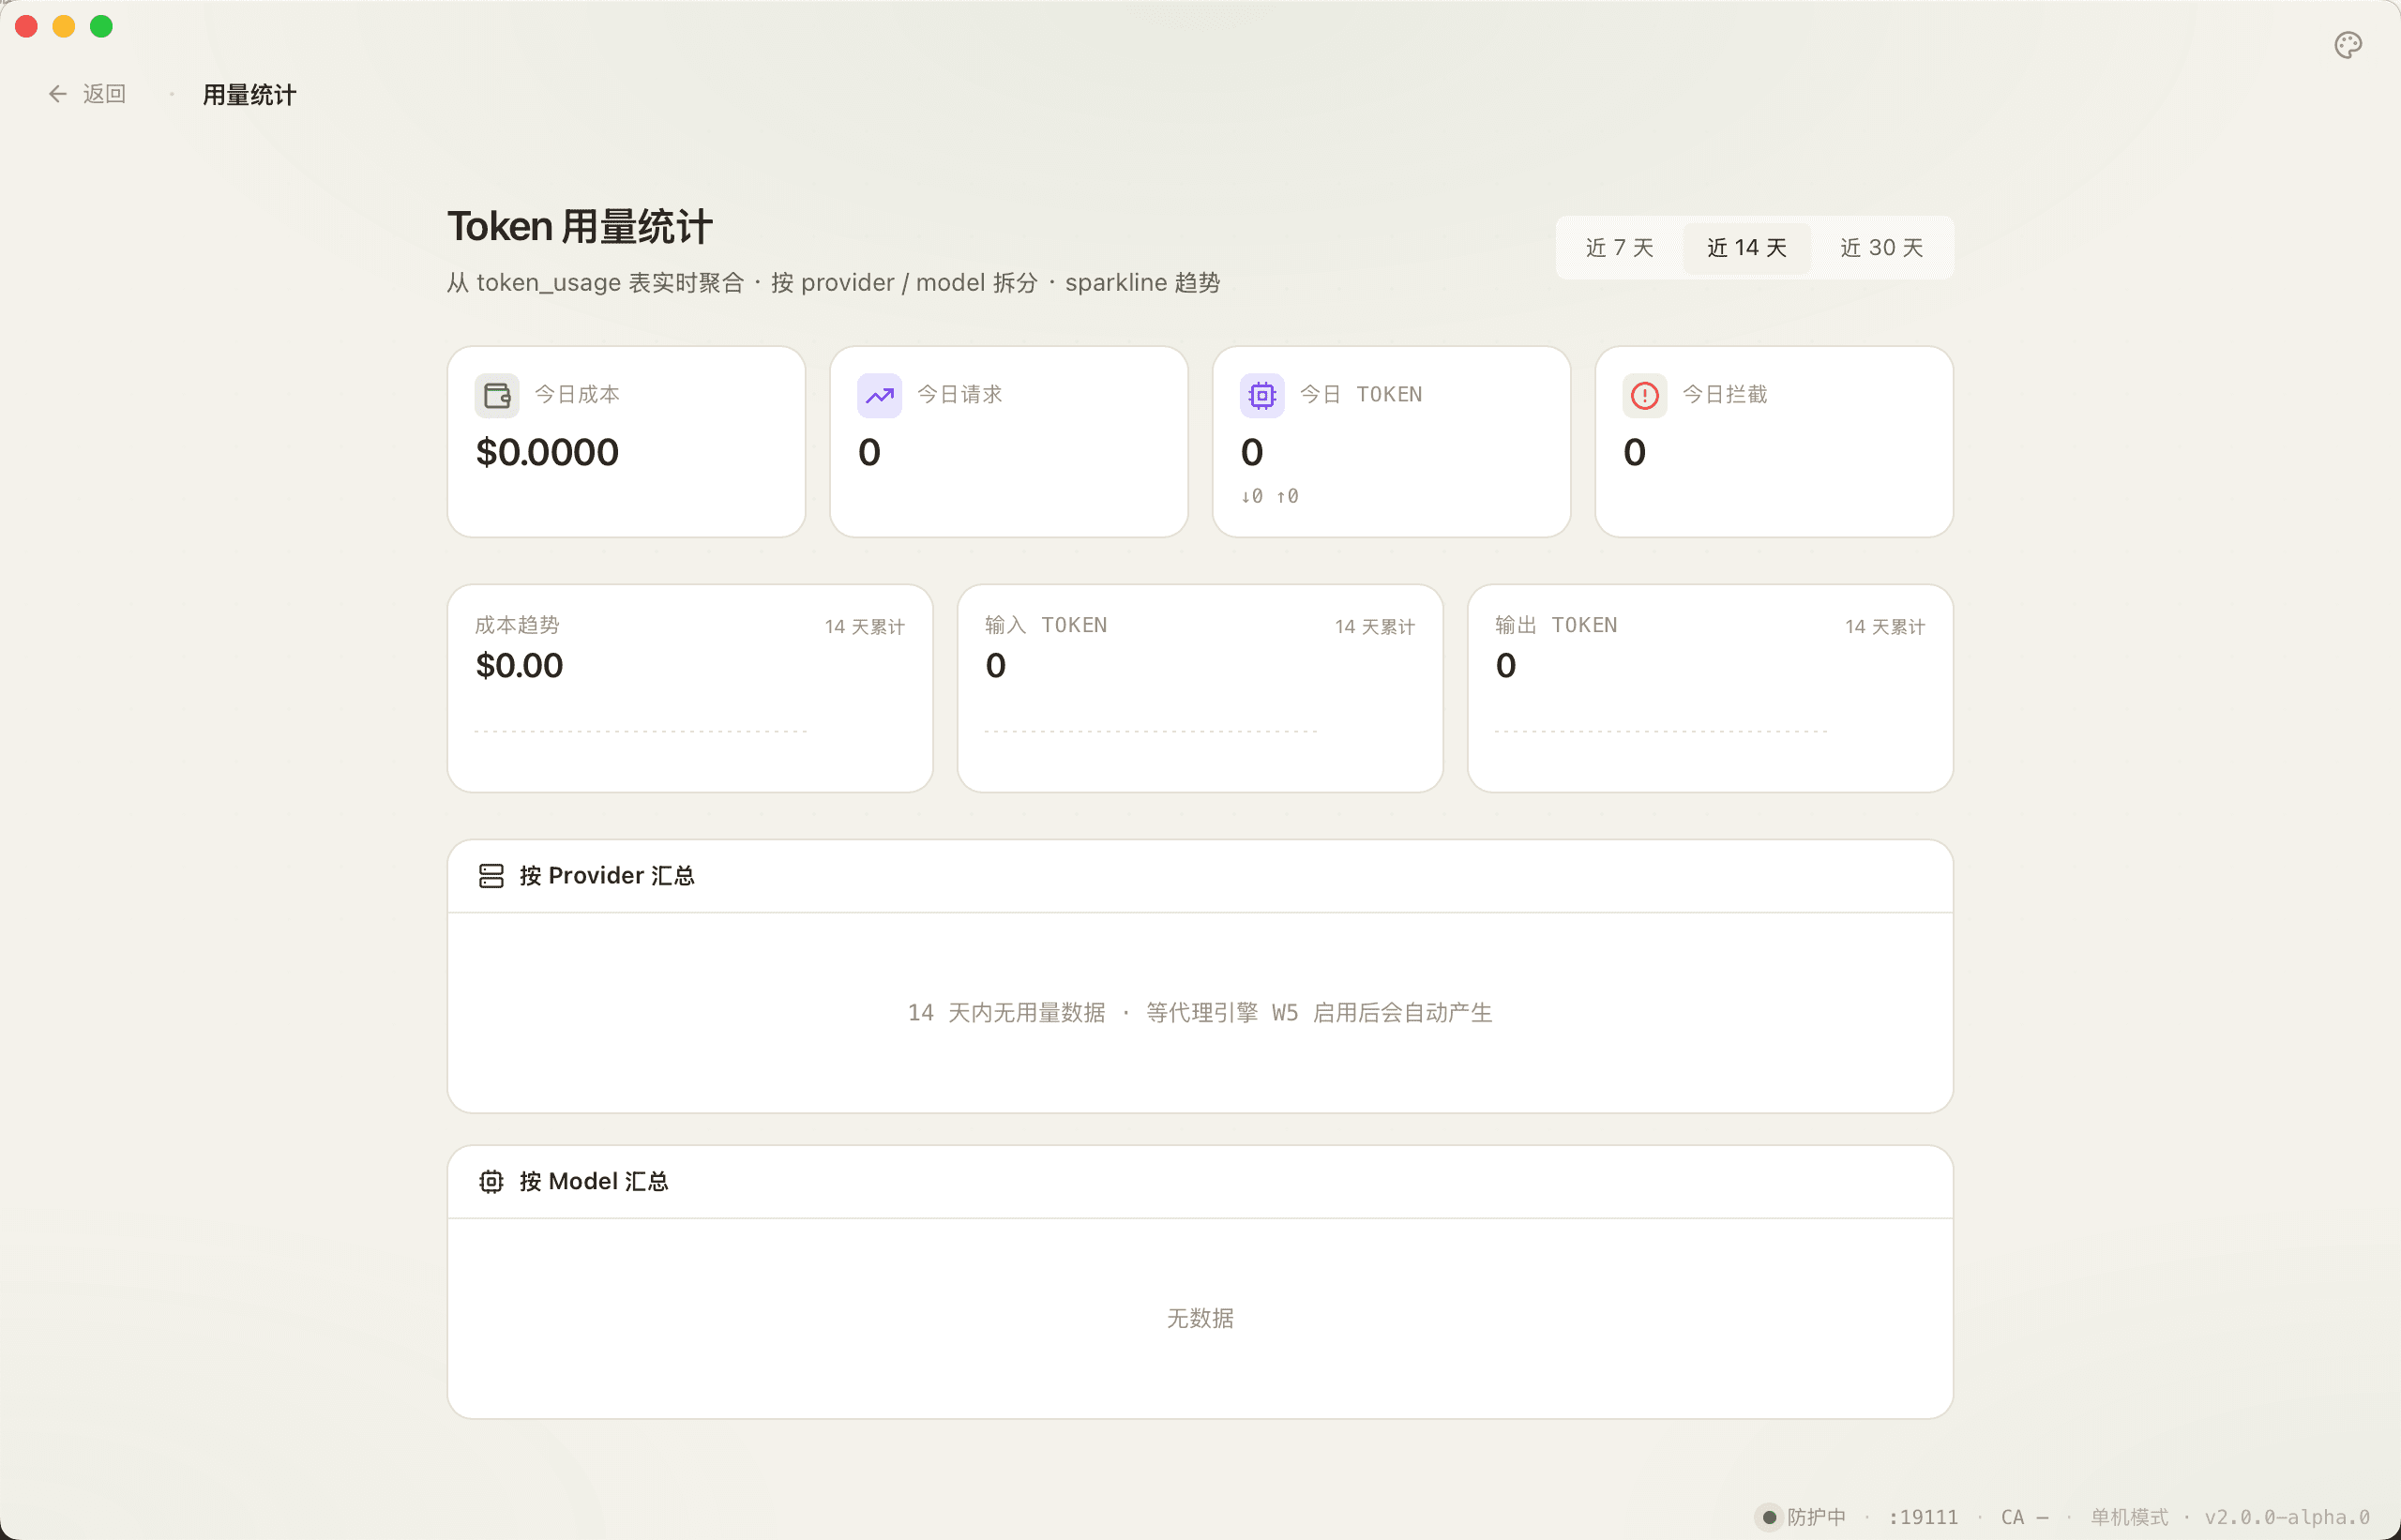
Usage stats
The usage page groups token spend by Agent / Provider / Model with a sparkline per row. It's the fastest way to spot which tool or model is burning money.
Set a budget threshold and ClawHeart fail-closes the traffic when you exceed it.
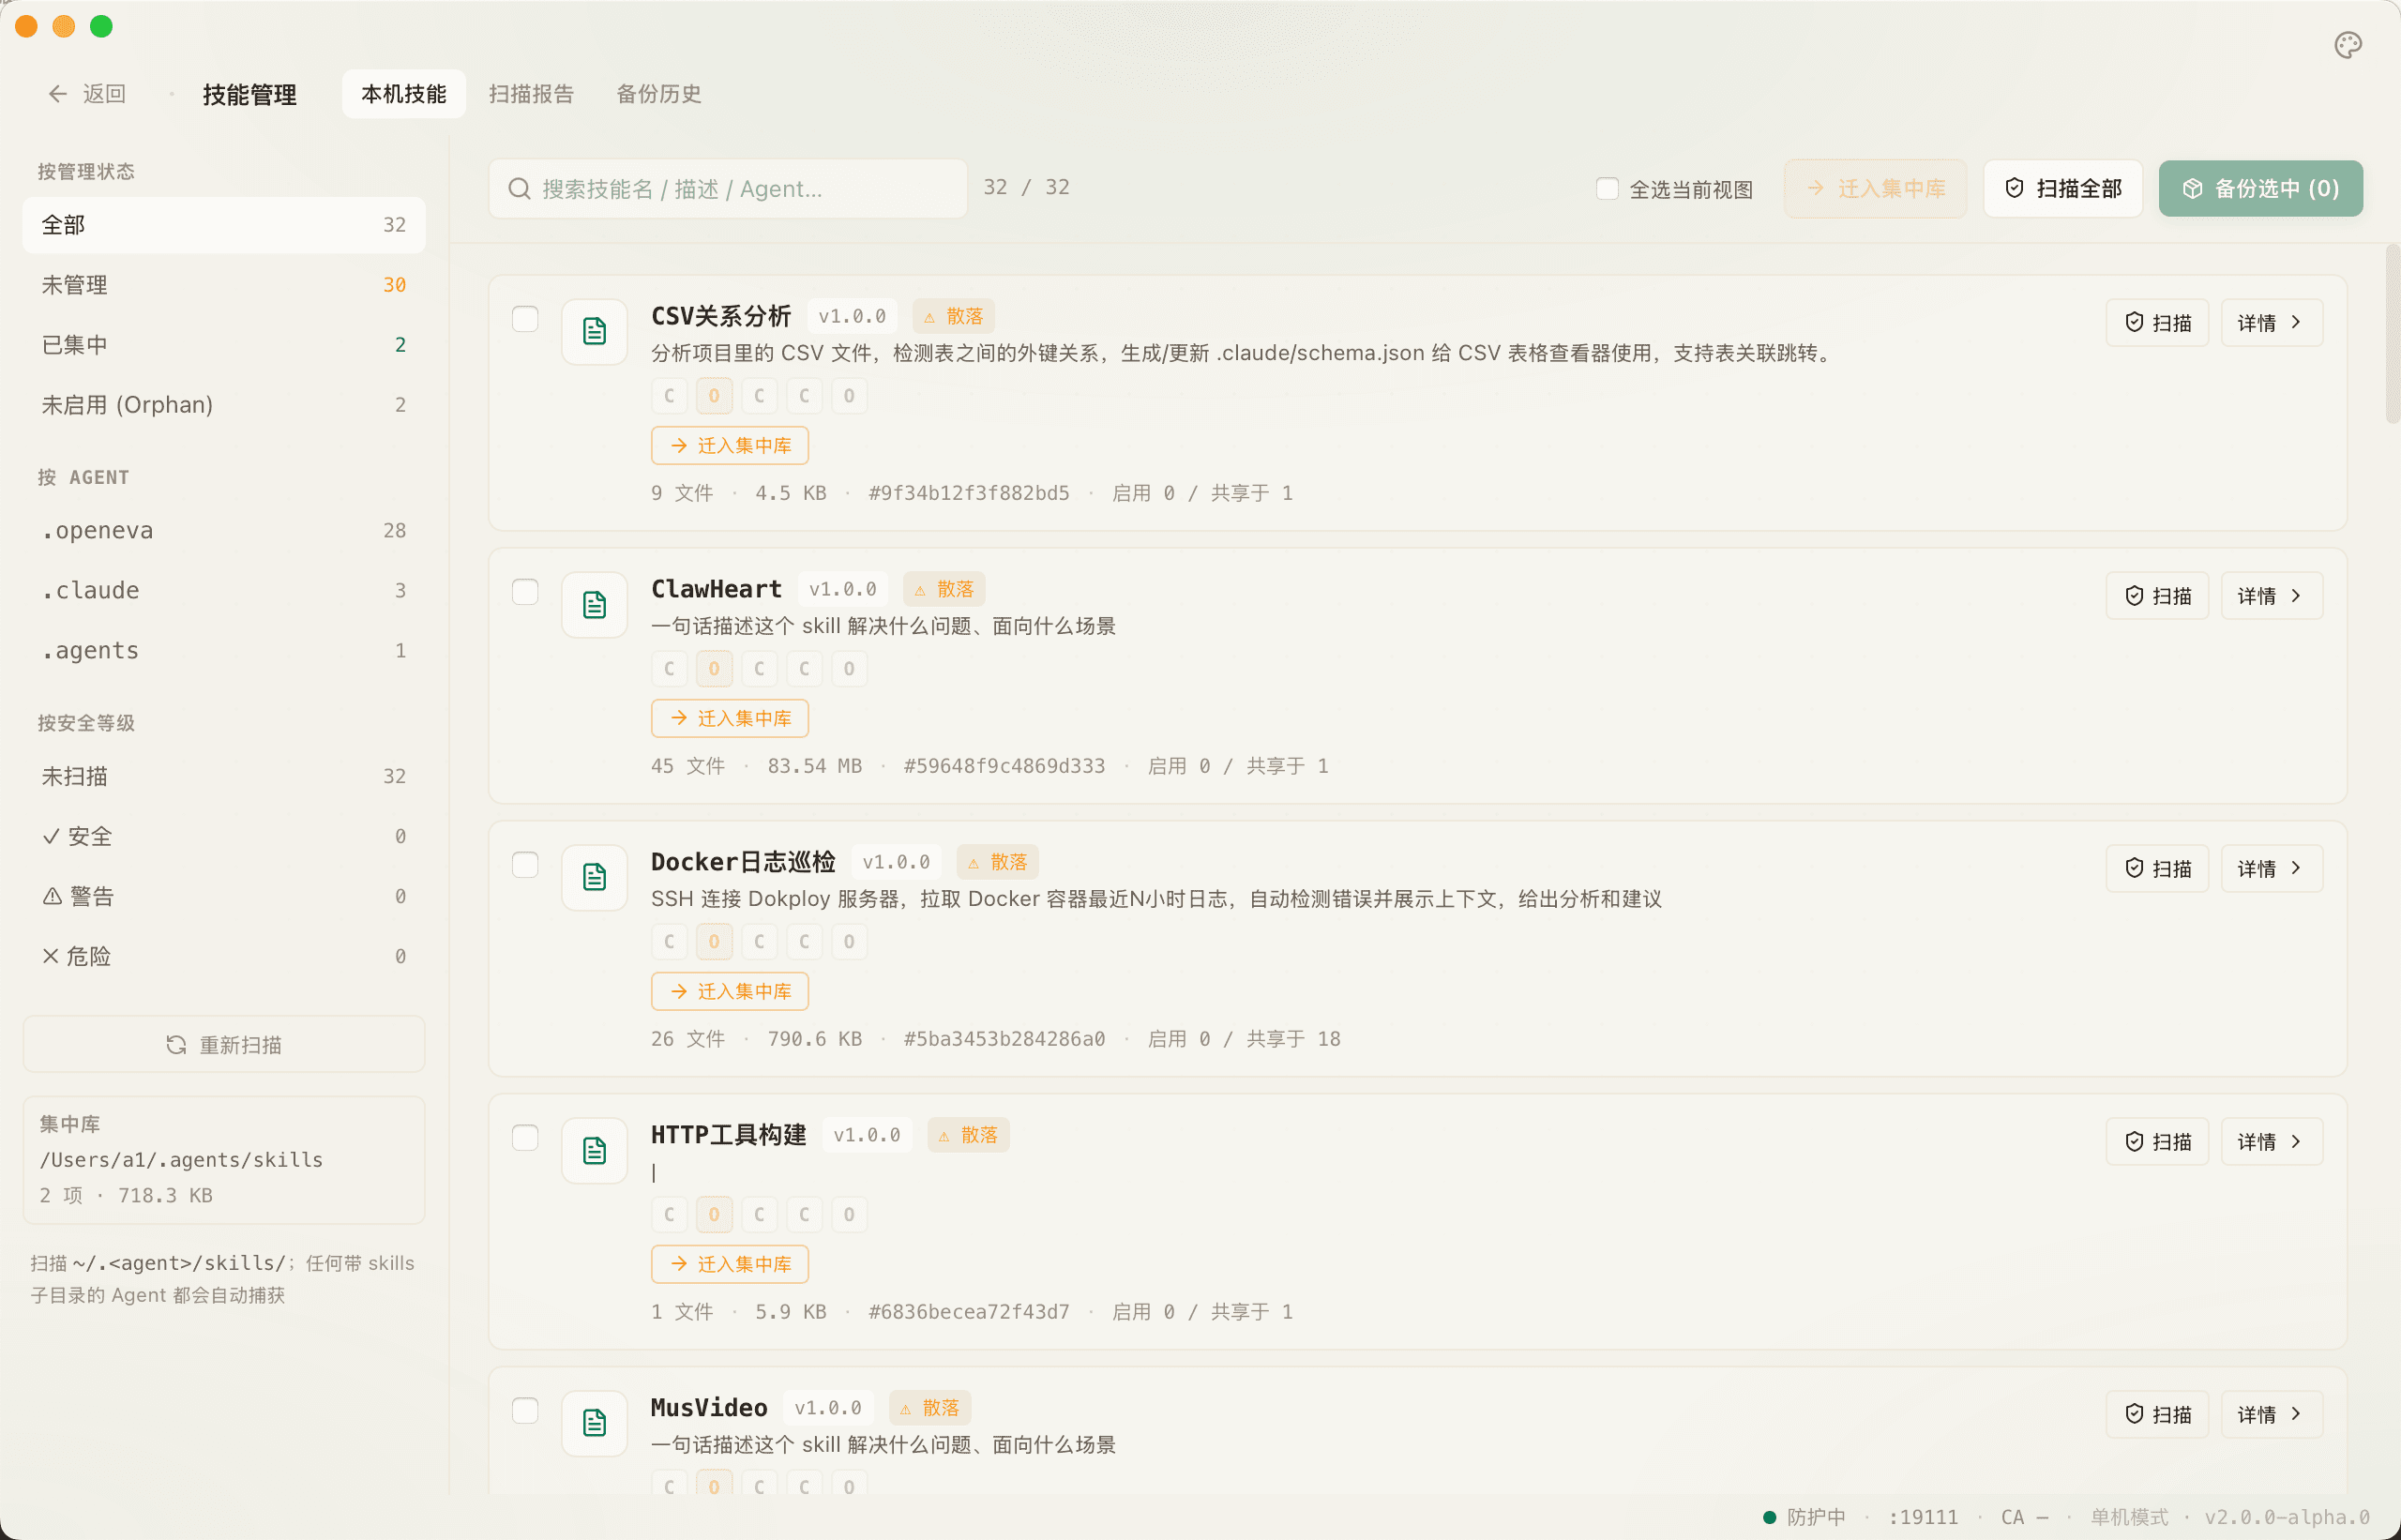
Skill management
Wildcard-scans `~/.<agent>/skills/` and runs the SkillGuard rule set to score each skill (command exec / network egress / file access / credential leakage).
The page lets you one-click bundle, back up, and compare historical score changes.
AdvancedSwitching tiers and customization
Switch monitoring tier
The Monitoring Mode page lays tier1 / tier2 / tier3 out horizontally and clearly labels each: coverage scope, install steps, whether a CA cert is required.
Switching is atomic — the old tier's config is uninstalled, the new tier installed automatically.
All-in-one Settings
10-language switcher, rule-set toggle / customization, log retention policy, backup & restore, replay the onboarding flow — all from the settings page.
Sensitive operations (delete all data / reset, etc.) all show a confirmation dialog.

13 steps in, and you've covered every core feature of ClawHeart
Got questions? Open Settings → Replay onboarding to walk through it again. Or file a GitHub issue or check the full docs.